
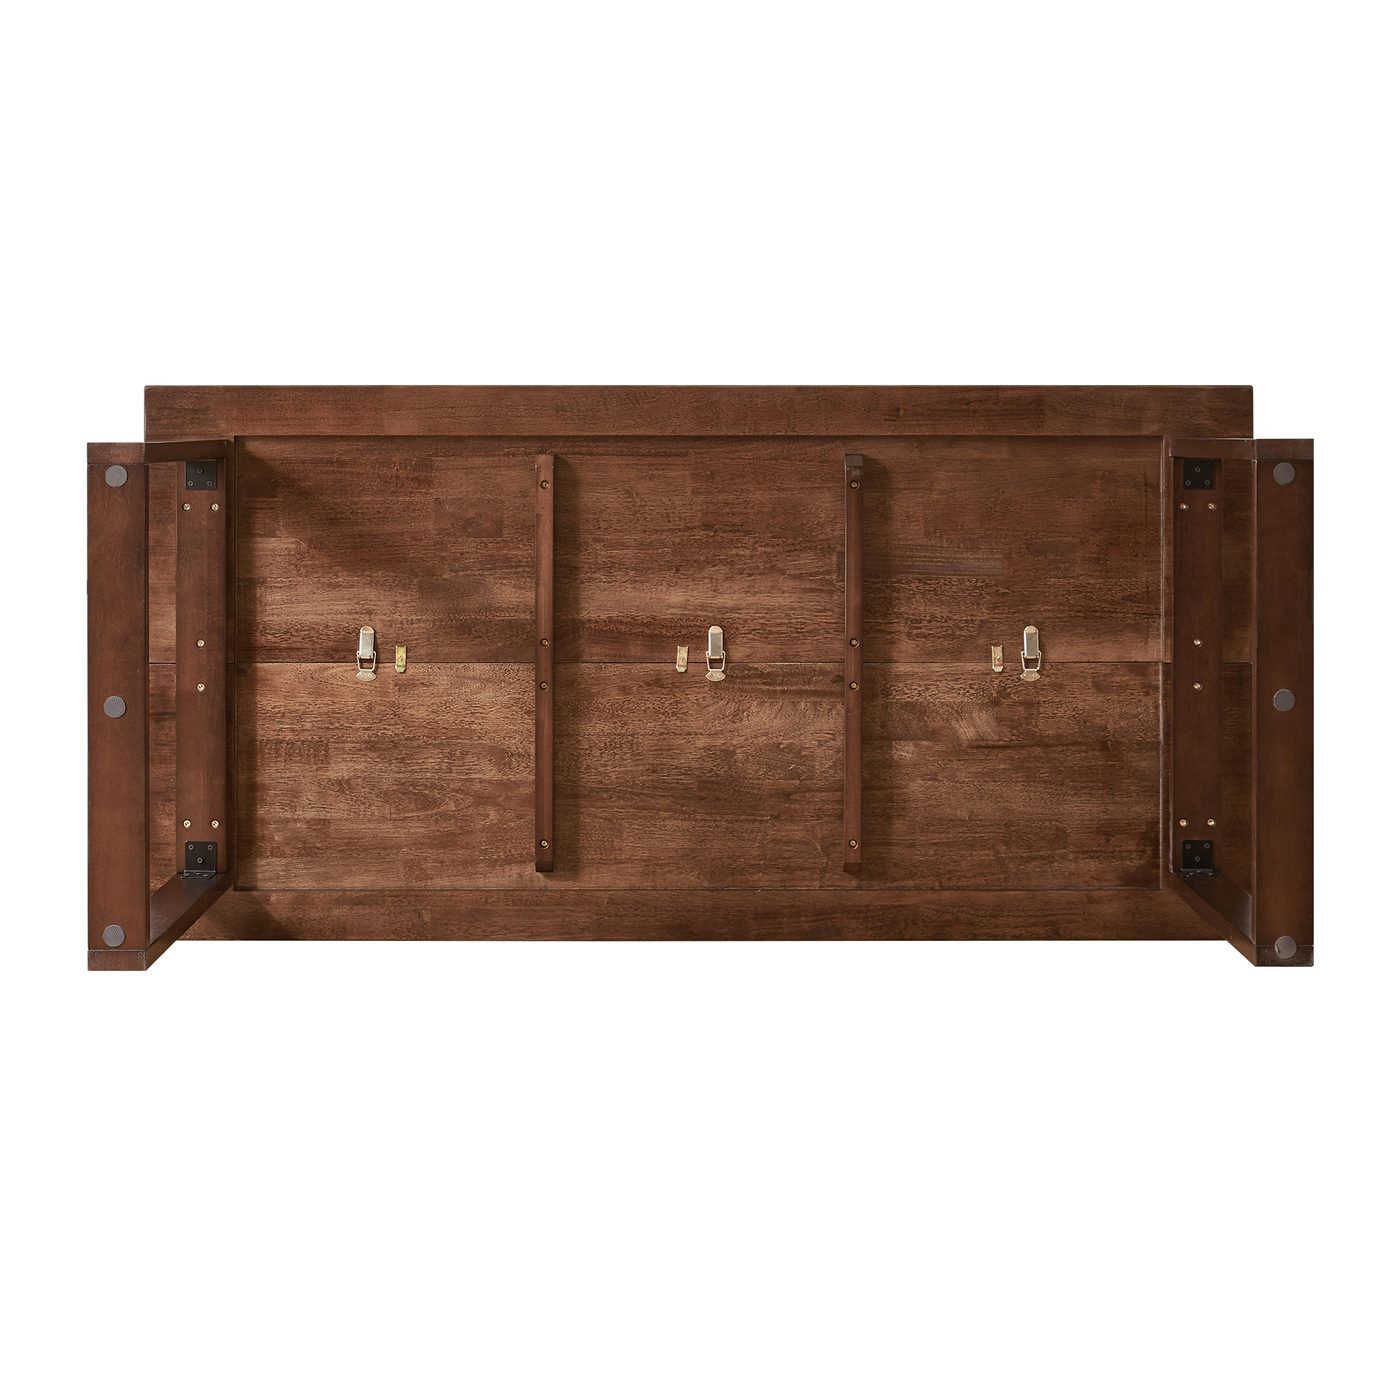
Set a 70.9-inch tabletop on two sawhorses and look at the underside first. Ours shows the top built from boards joined edge to edge, two cross braces screwed across them, and three metal latches. Turn it over and the walnut finish covers almost all of it, but two thin lines still cross the top, one near each end.
That is when most buyers search “are glue lines normal on a solid wood table,” and the internet answers with a number: ten inches apart, or the panel is supposed to be veneer. The number is real, and it is a bad test.
What the ten-inch rule is trying to tell you
Three furniture retailers publish the same test. RealCraft: “Real solid wood has glue lines spaced about ten inches apart — though this varies by product and design.” Gates Furniture gives the same spacing. Laurel Crown explains why: “These glue joints are rarely more than 10 inches apart because that is the maximum width of most available milled lumber.”
That last sentence is the whole rule. Ten inches is not a threshold, it is an average of how wide boards come out of a mill.
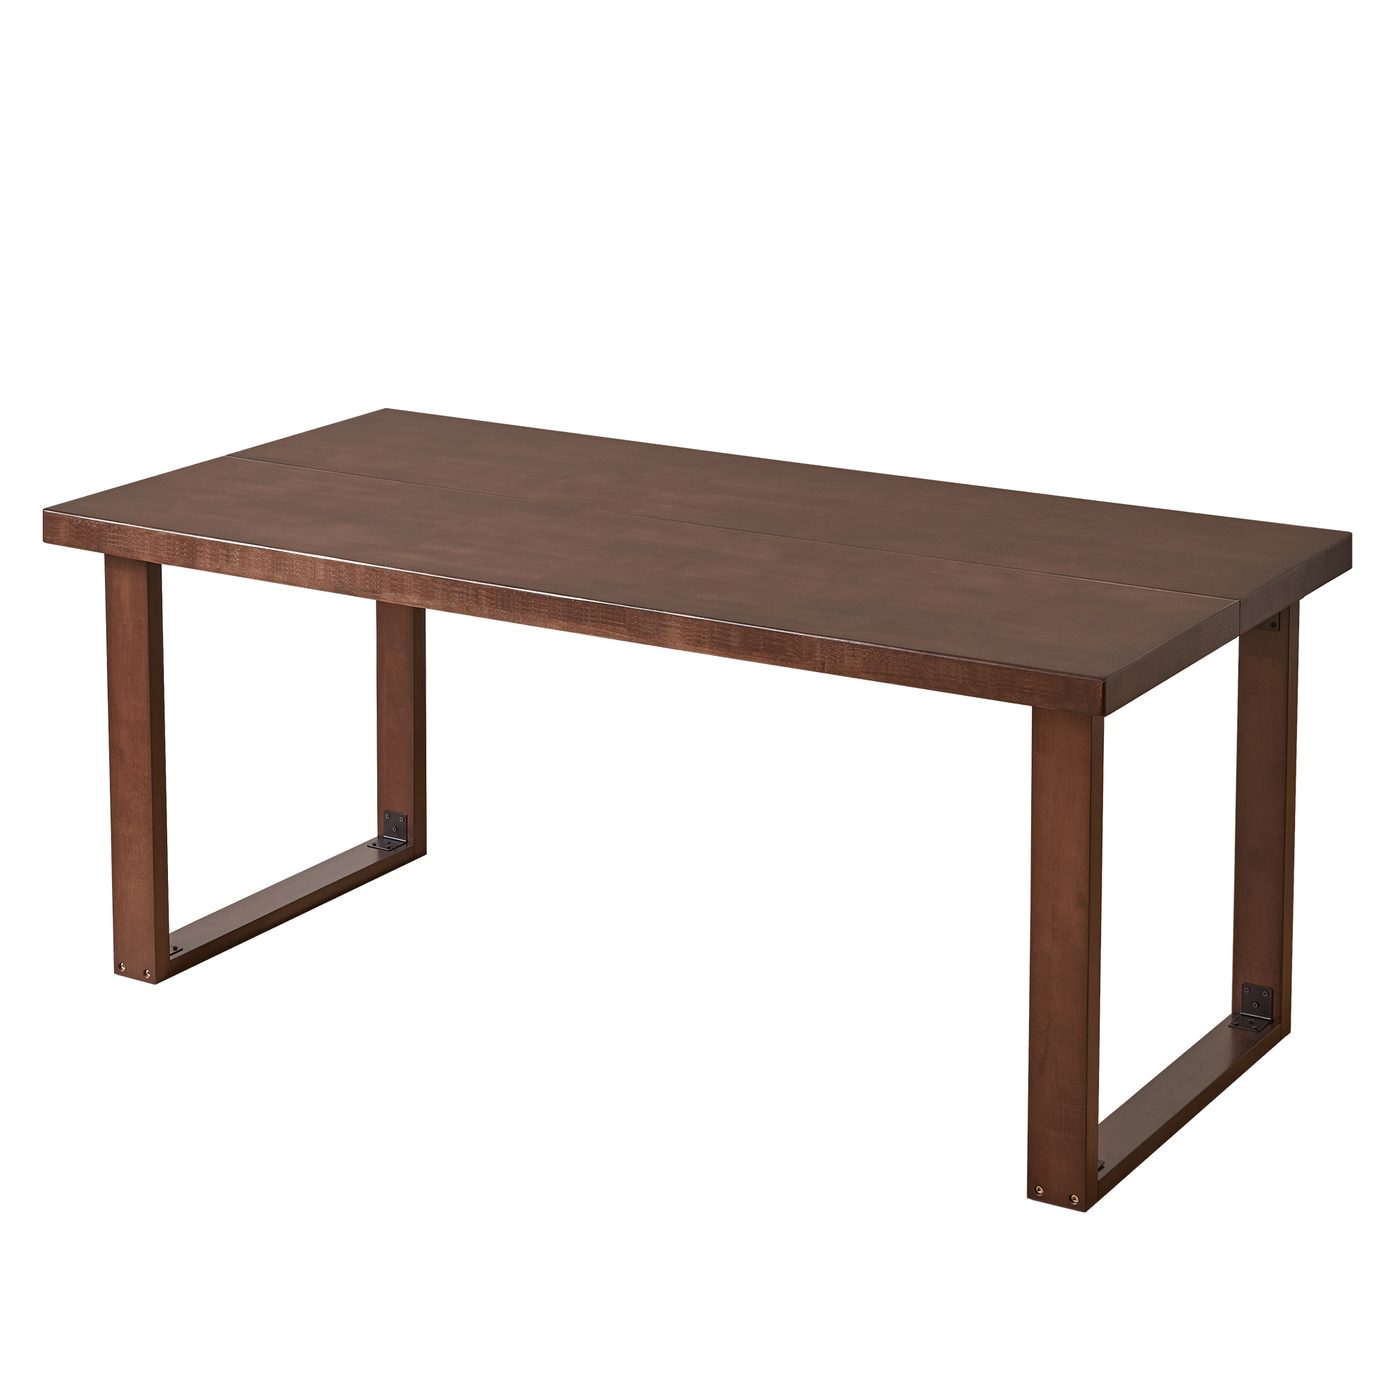
Run it on the 35.4-inch depth of this table and you get 3.5 — four boards at ten inches each. The photos show two seam lines. Both can be right; spacing depends on how many pieces the top was assembled from. A line 10 inches in from each end of a 70.9-inch top would leave a single 50-inch board in the middle, and that needs a log over four feet across.
Why rubberwood tops are glued up at all
Rubberwood is Hevea brasiliensis, and the trees are modest: the Wood Database lists them at 75–100 ft tall with a trunk 1–3 ft in diameter. Squared and edged, a log that size will not produce a 35.4-inch-wide board at furniture grade, and the same entry says rubberwood “tends to warp and twist in drying, though it is fairly stable in service once seasoned.”
Narrow boards dry more evenly than wide ones, so the top is built from strips glued edge to edge. What varies is how well the glue-up was done, and that is not visible in the spacing. Rubberwood is also what most of the tables here are made of.
Where the same line gets read as a defect
Ask a finishing shop and you get the opposite reading. A WOODWEB thread opens with the shop’s summary — “The veneer manufacturer should detect and eliminate glue lines; at the finishing stage, they are hard to deal with” — then the customer’s description: “We thought we had eliminated the seams after sanding – you can’t see them before finishing, but then after the second coat they appear, causing a very large headache.”
The thread is about veneer, but two things transfer: a seam can be invisible on bare wood and appear after finishing, because film changes how light hits a sunken joint; and the cause named by the forum’s technical advisor is too much adhesive, with moisture content above 10% making it worse.
So the camps are not fighting. The guides say a visible seam proves solid construction; the finishers say a fat seam proves a sloppy one. Neither tells you what your seam is.
What actually decides whether the seam stays put
Seasonal movement, and how the boards were turned before gluing.
The Wood Database gives rubberwood 2.3% radial shrinkage and 5.1% tangential — a ratio of 2.2. A flatsawn board moves about twice as much across its width as through its thickness, which is why strips get flipped so adjacent boards present their growth rings differently. Laurel Crown: “Often, the grain of adjacent boards will run in opposite directions, a technique a woodworker will employ to prevent and fight wood from warping.”
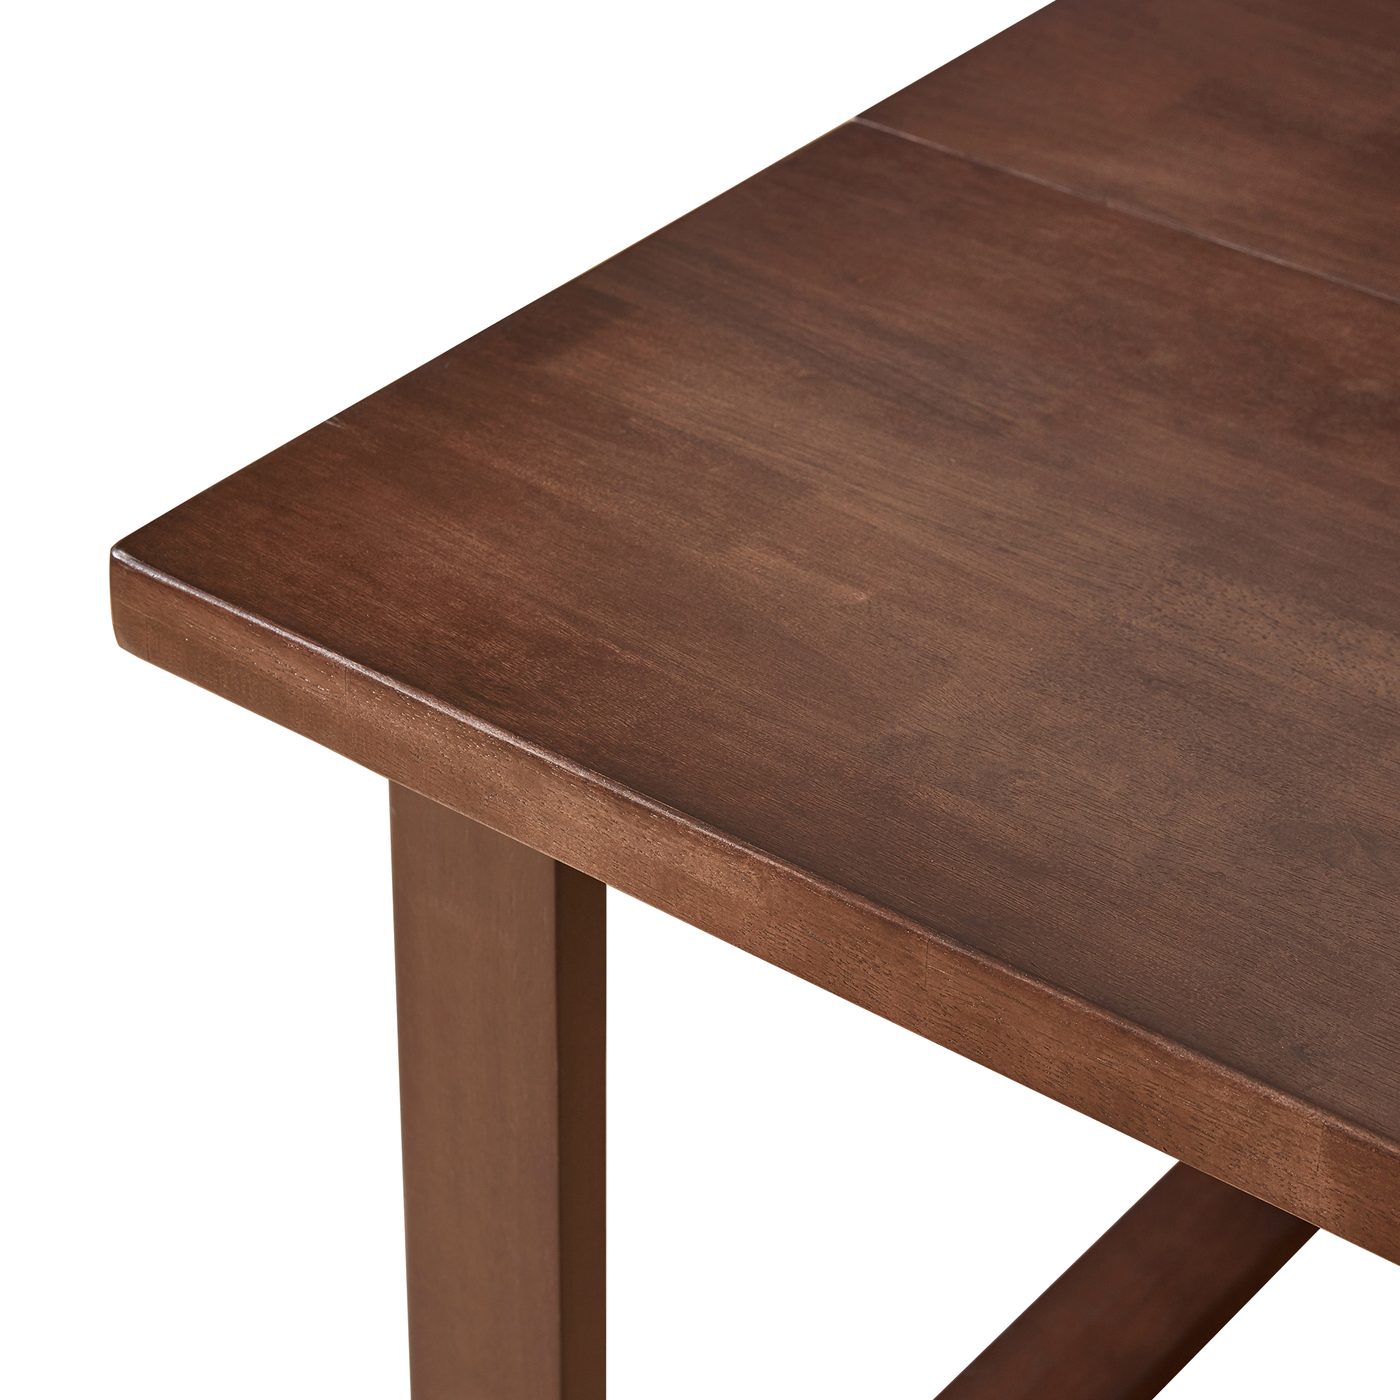
On this top the photos show it: the middle section’s grain runs at a different angle from the sections on either end, and the finish reads lighter or darker from board to board. That is the boards, not the glue.
Underneath, two cross braces run the depth of the top and three latches hold it to the leg frames. That hardware keeps a 70.9 × 35.4-inch panel flat in a heated room; the glue holds boards to each other, not the panel to a plane. If a top rocks after a winter, look at the braces first.
Five minutes with a fingernail and a lamp
Do this before assembly; the top is the heavy part of the two boxes, 87.7 lbs here.
- Light along the surface, not down at it. A WOODWEB contributor finds glue lines by killing the overhead lights and raking the top with two 500 W quartz work lights “placed at a maximum oblique angle.” A phone torch held low does the same job.
- Drag a fingernail across each seam, perpendicular to it. A tight joint is level and the nail passes without a catch; a step you can feel is a glue-up that was not flattened after clamping. Wipe the seam too: finish is part of the surface, dried squeeze-out sits on it as a ridge.
- Look at the edge, not the face. In the corner photo above, the grain runs through the full thickness of the top. A seam that stops at the edge — a line where a skin ends and a core begins — is the veneer read, which the listing-reading guide covers.
- Photograph it straight away. Damage and defects run on a 14-day clock from delivery, not from the day you get around to assembling.
| What you see | What it usually means |
|---|---|
| Thin dark line, level, grain continuing through the edge | Normal edge-glued joint. Nothing to fix. |
| Line you can feel with a fingernail, or a ridge of hard film | Glue-up or finishing fault. Raise it inside the 14-day window. |
| Line that appeared after a few weeks of heating | Movement at the joint. A hairline that closes in summer is seasonal, not a defect. |
| Clear color difference between two boards | Board selection, normal in a finished rubberwood top. |
What you cannot fix after the finish goes on
A step at a seam is a sanding job, and sanding a finished top means refinishing the whole surface to match — on a walnut finish, that comes back patchy. The supplier sheet lists the top at 4 cm (1.57 in); the product page prints no thickness and no board count, so ask before ordering.
A top with no visible joints is a different product class: one wide slab, more movement, more cost, more risk of splits at the ends in a dry house. The winter cracking guide covers that trade-off.
Ask three things before buying any solid top: how many boards, how wide, how thick. A seller who answers all three is describing a panel; a seller who says “solid wood” and stops is telling you the material, not the construction. Then decide what a line on arrival has to be: level, tight, free of adhesive. If it is, the seam is doing its job, at ten inches from its neighbor or twenty.